Anyone who owns a motorcycle knows that it is obviously much more fun to be out and riding around than stuck home washing it, but they also know that it is an essential part of taking care of the machine you love so much. How often you wash your motorcycle is a balancing act. Washing often allows you to make sure everything perfectly clean and running at optimal condition, but washing your bike too much can displace lubricants from sensitive areas on your bike. If you want to be able to ride around without a care in the world, here is a helpful guide on how to properly wash your motorcycle that is sure to help keep it clean and purring like a kitten.
The Prep
Before you can wash your bike, you need to make sure it’s ready to be washed. Just how you would remove non-washable items from the pockets of your laundry before tossing it into the machine, so to must you do a once over on you bike and make sure you’ve removed everything that shouldn’t get wet. Move your bike to a cool shady place out of direct sunlight and wait for it to become cool. Do not try to wash your bike right after a long ride, you need the bike to be cooled down to ensure that you don’t end up with water spots or dried on film from any cleaning solutions. Once your bike is in place and ready to be washed, gather together your supplies, they include:
- Bucket (the two bucket system works best, with one bucket for soapy water and the other for a clean rinse)
- Specially formulated automotive soap (not dish soap, pet soap, shampoo, hand soap, or any other non-automotive detergent)
- Bug/Tar remover, as well as any other degreasers or engine cleaners
- Toothbrush to get into those hard to reach places and crevices
- WD-40 for water displacement and the gentle removal of any built up grease. It is NOT, however, a lubricant and should not be used as such.
- Various paint and metal polishes
- Micro fiber rags and 100% cotton sponges for washing
- Cotton or microfiber towels and a chamois for drying
The Wash
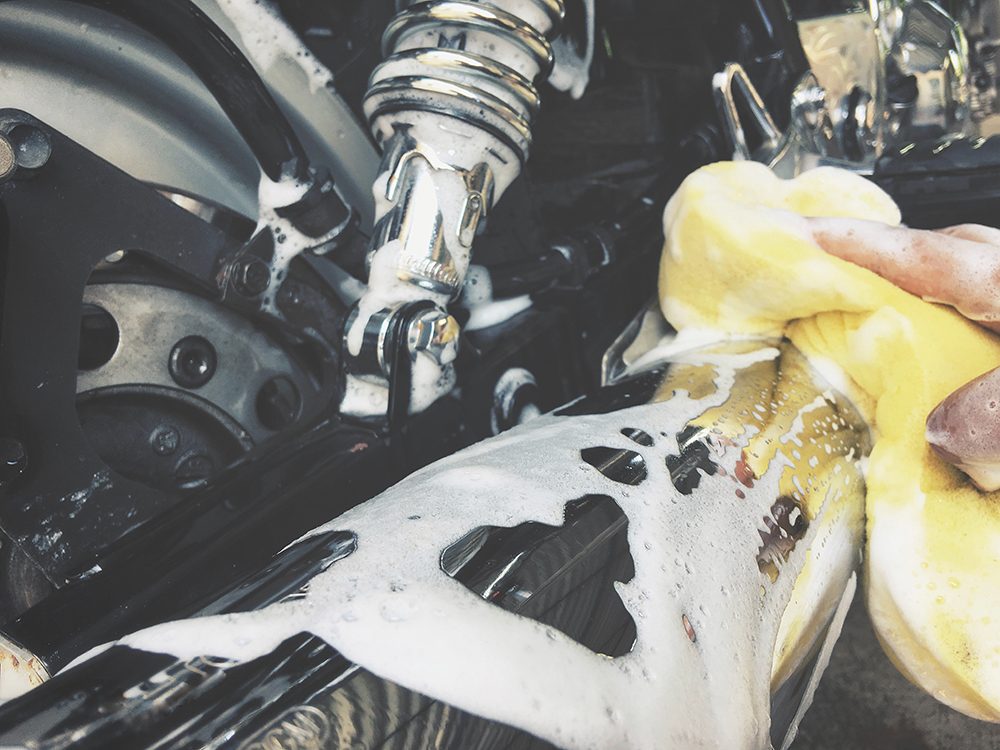
First, you need to know that you don’t need a whole lot of water. Motorcycles are small and have many exposed areas that may contain electrical components that should be kept as dry as possible. You don’t need a heavy-duty pressure washer or really even a garden hose; all you need is a bucket, a sponge, and the right soap. If you absolutely must use a high pressure cleaning method due to excessive grease, mud, or dirt build up, make sure you don’t use anything over 2000psi and keep the water away from your bikes most delicate parts. Only use certain cloths and sponges that wont leave streaks or scratches on the surface of your bike like cotton and microfiber, and keep each one separate. You wouldn’t want to use the sponge from your chain and wheel spokes to be the same one you use for your seat and body, keeping separate cleaning rags for different areas on the bike will help you avoid dirt and grease from traveling to other areas and negating the entire washing process. Once again, because this cannot be stressed enough, only use soap that is specially made for motorcycles and double check that it is safe to use on all different kinds of paint.
The Polish, Wax, and Lube
Once you finish washing the bike, do a complete once over to see if you’ve missed any areas where dirt or grease may be especially tricky to remove. Next come the polish and/or wax. Some vinyl cleaners on your seat can cause you to slide forward while breaking, and tyre shine (if not applied properly) can mess with your tread. Always put your safety first and use the right products on every inch of your motorcycle to ensure optimal efficiency and safety. Use a soft car wax that adds a layer rather than removing one, but be wary of plastic or lacquer that may easily become damaged. Never put polish directly on your bike’s body, but rather put a little bit on a clean rag and work it in gently. Once the bike is dry you will be able to buff off any excess, leaving you with a bike like new. Last step before a full dry is to get out your lube. WD40 can be amazing for removing water or built up grease, but is not an adequate lubricant for places like wheel axles, cables, chains, hinges, levers, and more. Silicon or oil can be sprayed onto cables and hinges for some added lubrication that may have gotten washed off, and wax spray or special chain lube for your chain.
The Dry
Use a clean microfiber cloth or chamois to dry your motorcycle off as best your can, careful not to drop it on the ground to collect debris. Next it’s time to deep dry. You may see plenty of people out there turning to leaf blowers for a thorough dry, but nothing beats letting the wind do the work for you. If weather permits, take a slow drive at first, taking special care to gently squeeze your brakes to release trapped water, then hit the road and let the wind get rid of any water that may have gotten deeply embedded into your bike. Once you get home do another quick wipe down to get rid of any new water streaks and then relish in your beautifully clean bike. It will be more than ready for you the next time you want to go for a drive.
When you need quality replacement gaskets for your vintage bike, call Gasket King at 817.562.8178, shop online today or complete the online contact form to send us a question or learn more.